Adom Bridge
Public Made by Adomby adom
Adom Bridge unleashes your AI onto your full PC: full power, full safety. The AI breaks out of the container it runs in and onto your real machine, managing and running your entire laptop as you: launch apps, move files, drive any window, control KiCad, Fusion 360 or your real signed-in browser. Works with any AI, cloud or local (Claude Desktop, Claude Code, Codex), no Hydrogen required. Bridge and its bridges are an operating system for AI, with managed Node and Python runtimes, and a human-onl
Build your own bridge
Adom Bridge ships with bridges for KiCad, Fusion 360, Puppeteer, Blender and your real signed-in browser. This page is about the interesting part: you can add your own, and an AI will drive it the same day.
This is the narrative tour, written for someone who has never built one. If you are an AI and you are here to actually build a bridge, stop reading and load the skill library instead, listed at the bottom. The skills are the working reference; this page is the orientation.
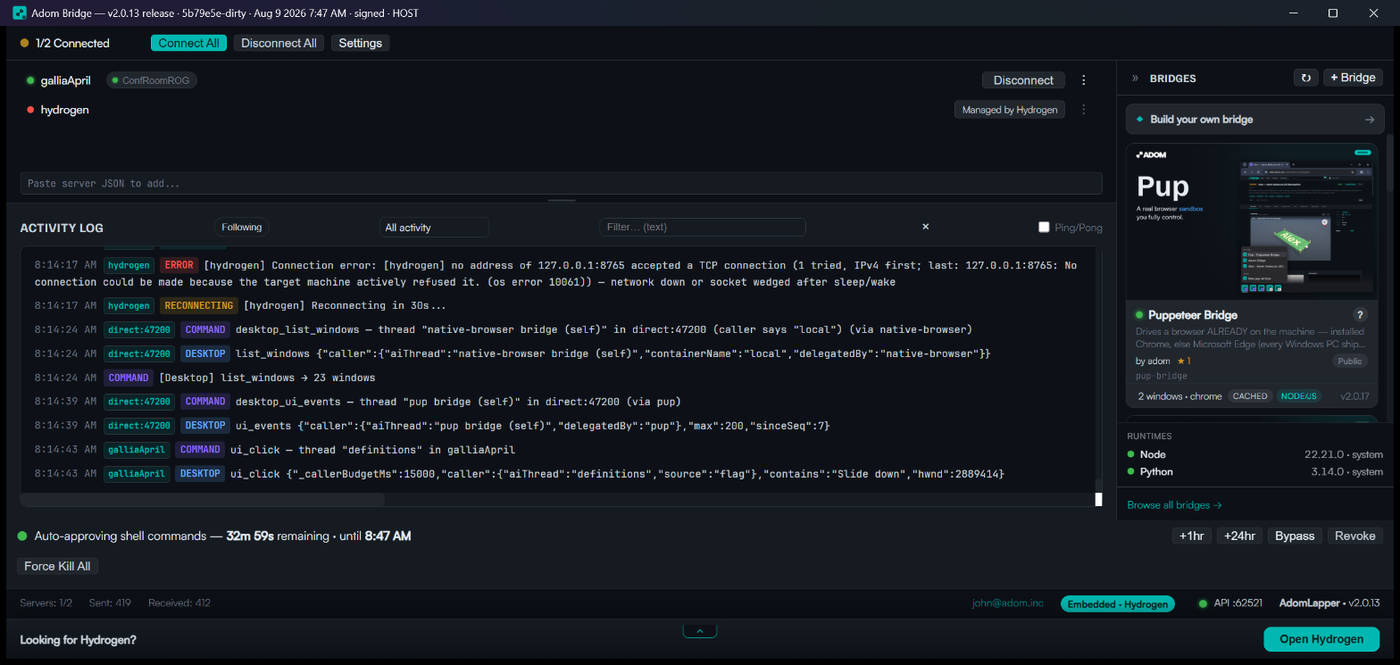
What a bridge actually is
A bridge is a small local program. Python, Node, Rust, a compiled executable, anything that can serve HTTP on localhost.
Adom Bridge spawns it, keeps it alive, and routes a namespace of verbs to it. The KiCad bridge owns everything starting with kicad_. Puppeteer owns pup_. Fusion owns fusion_. You pick a prefix and it is yours.
That is the entire contract. You are not writing a plugin against a framework, you are writing a little server that answers JSON.

The split matters, and it is the thing most people get wrong at first:
- Adom Bridge core owns the machine. Spawning, ports, health, permissions, screenshots, files, windows, notifications, the relay to the cloud. It stays generic and knows nothing about your app.
- You own your app. How to talk to it, what its verbs mean, what a good response looks like.
If you ever find yourself wanting core to special-case your app, that is the signal you are solving it in the wrong place.
Why a bridge is worth building
Because the AI is the user.
A cloud AI, or Claude Desktop on the same machine, asks for something in plain English. Adom Bridge routes it to your bridge, your bridge does the work, and the response goes straight back to the AI. No integration, no glue, no human in the middle relaying instructions.
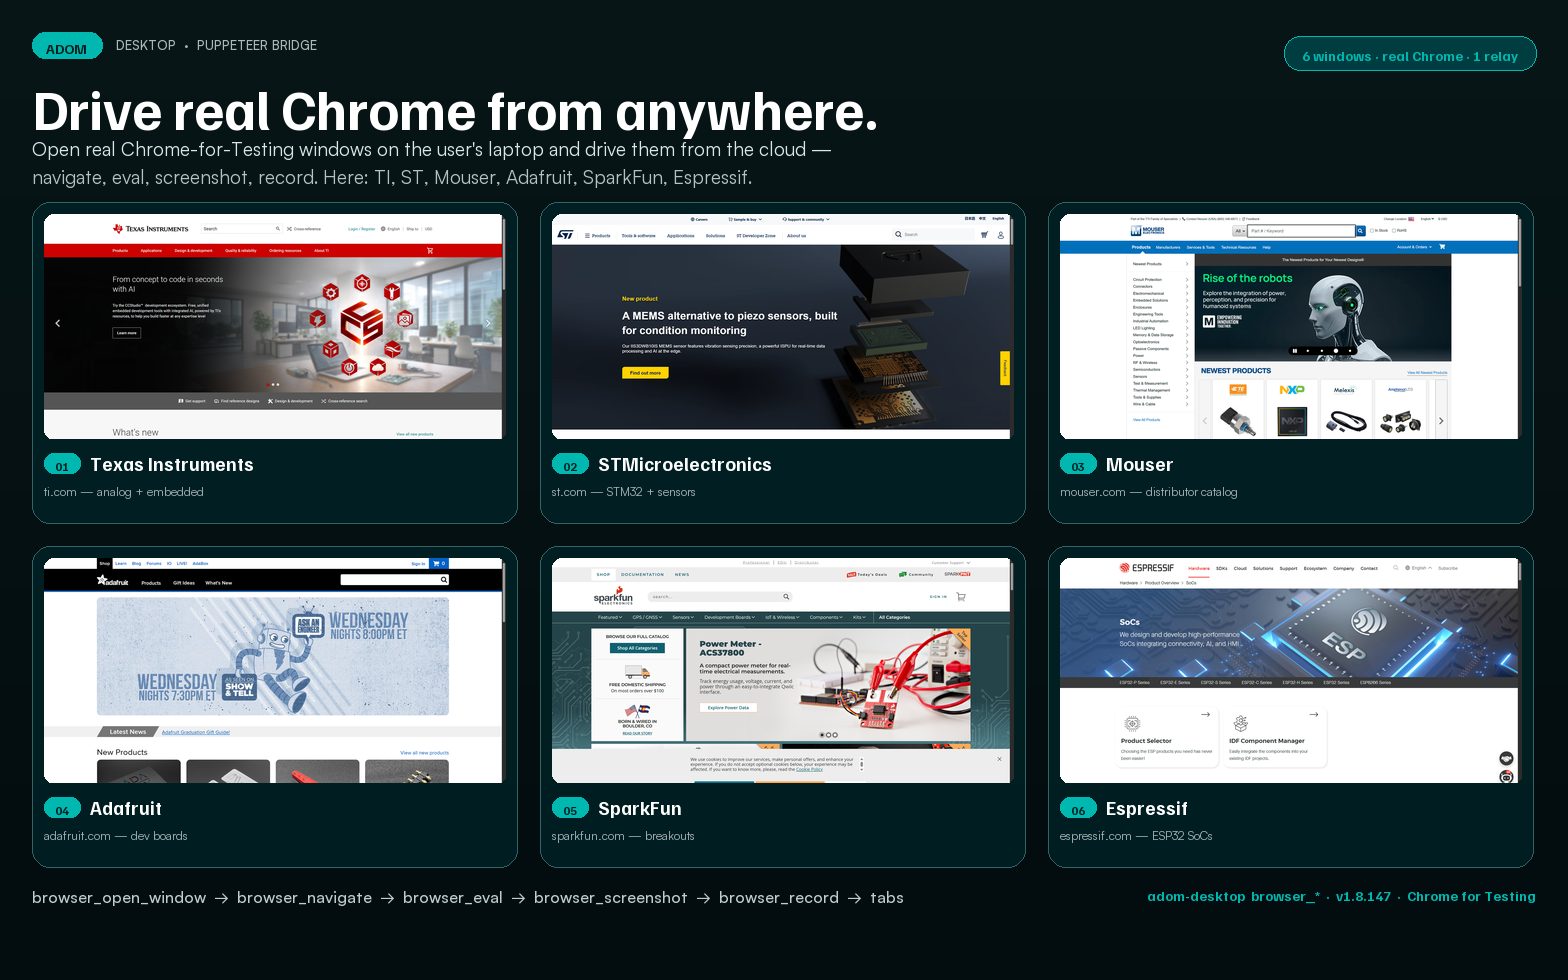
The bridges that already exist are proof of the range: pup drives a real signed-in Chrome, KiCad opens schematics and runs DRC, Fusion imports STEP and exports GLB. None of that lives in Adom Bridge core. They are all just bridges.
The one principle that matters most
Read this twice, because it is the difference between a bridge an AI drives perfectly and one it fights.
The AI almost never reads your SKILL.md. It always reads the output of the call it just made.
So your leverage is not in documentation, it is in what every verb returns. A verb that answers {"success": true} leaves the AI guessing and retry-looping. A verb that answers with what just happened, the obvious next verb, the related verbs, and the pitfall to avoid gets driven correctly on the first attempt.
Adom Bridge relays every field of your response verbatim to the calling AI. Treat each verb's output as the documentation that will actually be read.
What the user sees
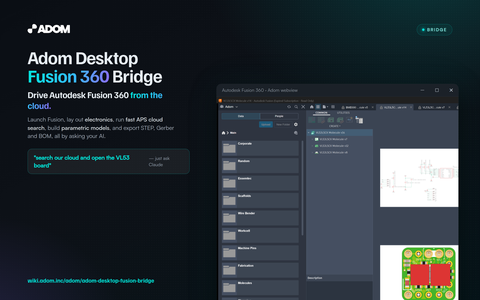
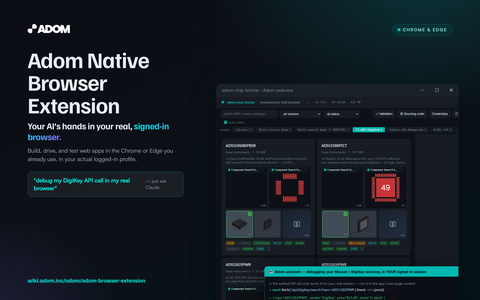
Your bridge is not a config entry. It renders as a card in the sidebar, with your hero art, your name, your description, and a live status light.
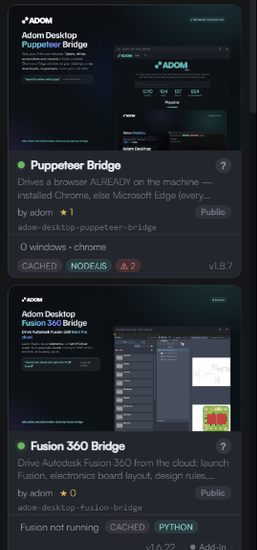
The light is yours to control. Your health endpoint can report green, yellow or red with a short summary and a longer tooltip, and Adom Bridge paints exactly what you say. The one state you do not own is grey, which means Adom Bridge cannot reach you at all.
Cards for a few of the shipped bridges, so you can see the range of presentation:
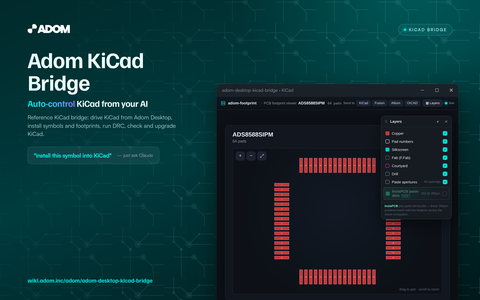
Click a card and you get a console: live log, command history, ports, process id, and the actions to pause, restart or kill it. You get all of that for free by existing.
The three things you publish
A finished bridge is three artifacts. Get all three right and someone can discover your bridge from a plain-English request, confirm it is installed, and drive it with no tribal knowledge.
1. The runtime. A versioned release zip plus a manifest, on your own wiki page. bridge_install streams it onto the user's machine and spawns it.
2. The skills. A package containing the consumer skill files that teach an AI in a container what your verbs do. Installed with adom-wiki pkg install.
3. The discoverability. Trigger phrases on your wiki page, so a user saying "open my app in pup" surfaces you.
Each artifact stays clean: runtime-only in the zip, skills-only in the package, and all media on the page. Mixing them is the most common publishing mistake, and it is what makes a package balloon to hundreds of megabytes.
Runtimes are handled for you
You do not have to make the user install Node or Python.
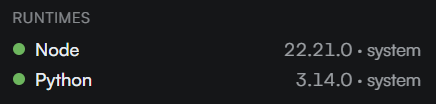
Adom Bridge provisions a portable Node and Python, with no elevation prompt and no installer, and hands them to your bridge. If your bridge is a Node bridge, its dependencies are installed for it.
The one rule you must honour: bind loopback, using the host Adom Bridge hands you. Bind 0.0.0.0 and you will trigger a Windows firewall prompt on someone else's machine, which is the fastest way to lose a user.
Permissions stay with the human
Your bridge inherits the permission model, so you do not have to invent one.

Anything genuinely dangerous is gated behind a human clicking approve. The AI can ask for that prompt to appear, but it can never grant on its own behalf. If your bridge exposes something risky, declare it and the gate applies to you too.
Reaching back into Adom Bridge
Your bridge is not sandboxed away from the rest of the system. From inside it you can call the full Adom Bridge verb set over loopback: take a screenshot, move a file, drive a window, raise a notification, even call another bridge.
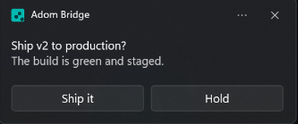
Two things worth knowing while you are doing that. Forward the caller headers you received, so the user can tell which AI thread is actually driving their machine. And if you borrow a window that belongs to another application, you can brand it as yours, so its taskbar button, its name and its icon read correctly instead of showing the host app.
Start from a sample, not a blank file
Two minimal bridges ship as working references, one in Python and one in Rust. They are deliberately tiny: a manifest, a server, a health endpoint, one verb.
Copy one, change the prefix, add a verb, and you have a bridge. Then read pup for what a mature one looks like, because it exercises nearly every part of the contract.
The skill library, which is the real reference
Everything above is orientation. The working reference is a set of skills that ship in the Adom Bridge package, split by the phase you are in, so an AI loads only what it needs:
| Skill | Load it when |
|---|---|
adom-bridge-sdk |
Orientation: the boundary, the artifacts, where every file lives |
adom-bridge-sdk-manifest |
Writing or fixing bridge.json |
adom-bridge-sdk-runtime |
Spawn, runtimes, loopback bind, readiness, status light, logging |
adom-bridge-sdk-callback |
Calling Adom Bridge verbs back, caller provenance, window branding |
adom-bridge-sdk-publish |
Shipping: the zip and manifest, the skills package, discovery, the checklist |
adom-bridge-sdk-audit |
Auditing a shipped bridge, staying current, filing issues |
Install them with:
adom-wiki pkg install adom/adom-bridge
Then ask your AI to build the bridge. That is the intended workflow: you describe the app you want reachable, and the AI does the rest against these skills.
Naming and where your page lives
Bridge pages follow one convention: <name>-bridge, with no prefix. So kicad-bridge, fusion-bridge, pup-bridge, rustdesk-bridge. Your bridge gets its own wiki page, which is where your release zip, your manifest, your hero art and your discovery triggers live.
Third-party bridges are owned by their authors and live under their own accounts, following the same convention.
# Build your own bridge
Adom Bridge ships with bridges for KiCad, Fusion 360, Puppeteer, Blender and your real signed-in browser. This page is about the interesting part: **you can add your own**, and an AI will drive it the same day.
This is the narrative tour, written for someone who has never built one. If you are an AI and you are here to actually build a bridge, stop reading and load the skill library instead, listed at the bottom. The skills are the working reference; this page is the orientation.

## What a bridge actually is
A bridge is a small local program. Python, Node, Rust, a compiled executable, anything that can serve HTTP on localhost.
Adom Bridge spawns it, keeps it alive, and routes a **namespace of verbs** to it. The KiCad bridge owns everything starting with `kicad_`. Puppeteer owns `pup_`. Fusion owns `fusion_`. You pick a prefix and it is yours.
That is the entire contract. You are not writing a plugin against a framework, you are writing a little server that answers JSON.

The split matters, and it is the thing most people get wrong at first:
- **Adom Bridge core owns the machine.** Spawning, ports, health, permissions, screenshots, files, windows, notifications, the relay to the cloud. It stays generic and knows nothing about your app.
- **You own your app.** How to talk to it, what its verbs mean, what a good response looks like.
If you ever find yourself wanting core to special-case your app, that is the signal you are solving it in the wrong place.
## Why a bridge is worth building
Because the AI is the user.
A cloud AI, or Claude Desktop on the same machine, asks for something in plain English. Adom Bridge routes it to your bridge, your bridge does the work, and the response goes straight back to the AI. No integration, no glue, no human in the middle relaying instructions.

The bridges that already exist are proof of the range: pup drives a real signed-in Chrome, KiCad opens schematics and runs DRC, Fusion imports STEP and exports GLB. None of that lives in Adom Bridge core. They are all just bridges.
## The one principle that matters most
Read this twice, because it is the difference between a bridge an AI drives perfectly and one it fights.
**The AI almost never reads your SKILL.md. It always reads the output of the call it just made.**
So your leverage is not in documentation, it is in what every verb **returns**. A verb that answers `{"success": true}` leaves the AI guessing and retry-looping. A verb that answers with what just happened, the obvious next verb, the related verbs, and the pitfall to avoid gets driven correctly on the first attempt.
Adom Bridge relays every field of your response **verbatim** to the calling AI. Treat each verb's output as the documentation that will actually be read.
## What the user sees
Your bridge is not a config entry. It renders as a card in the sidebar, with your hero art, your name, your description, and a live status light.

The light is yours to control. Your health endpoint can report green, yellow or red with a short summary and a longer tooltip, and Adom Bridge paints exactly what you say. The one state you do not own is grey, which means Adom Bridge cannot reach you at all.
Cards for a few of the shipped bridges, so you can see the range of presentation:


Click a card and you get a console: live log, command history, ports, process id, and the actions to pause, restart or kill it. You get all of that for free by existing.
## The three things you publish
A finished bridge is three artifacts. Get all three right and someone can discover your bridge from a plain-English request, confirm it is installed, and drive it with no tribal knowledge.
**1. The runtime.** A versioned release zip plus a manifest, on your own wiki page. `bridge_install` streams it onto the user's machine and spawns it.
**2. The skills.** A package containing the consumer skill files that teach an AI in a container what your verbs do. Installed with `adom-wiki pkg install`.
**3. The discoverability.** Trigger phrases on your wiki page, so a user saying "open my app in pup" surfaces you.
Each artifact stays clean: runtime-only in the zip, skills-only in the package, and all media on the page. Mixing them is the most common publishing mistake, and it is what makes a package balloon to hundreds of megabytes.
## Runtimes are handled for you
You do not have to make the user install Node or Python.

Adom Bridge provisions a portable Node and Python, with no elevation prompt and no installer, and hands them to your bridge. If your bridge is a Node bridge, its dependencies are installed for it.
The one rule you must honour: **bind loopback**, using the host Adom Bridge hands you. Bind `0.0.0.0` and you will trigger a Windows firewall prompt on someone else's machine, which is the fastest way to lose a user.
## Permissions stay with the human
Your bridge inherits the permission model, so you do not have to invent one.

Anything genuinely dangerous is gated behind a human clicking approve. The AI can ask for that prompt to appear, but it can never grant on its own behalf. If your bridge exposes something risky, declare it and the gate applies to you too.
## Reaching back into Adom Bridge
Your bridge is not sandboxed away from the rest of the system. From inside it you can call the **full** Adom Bridge verb set over loopback: take a screenshot, move a file, drive a window, raise a notification, even call another bridge.

Two things worth knowing while you are doing that. Forward the caller headers you received, so the user can tell which AI thread is actually driving their machine. And if you borrow a window that belongs to another application, you can brand it as yours, so its taskbar button, its name and its icon read correctly instead of showing the host app.
## Start from a sample, not a blank file
Two minimal bridges ship as working references, one in Python and one in Rust. They are deliberately tiny: a manifest, a server, a health endpoint, one verb.
- [hello-python](https://wiki.adom.inc/adom/hello-python-bridge)
- [hello-rust](https://wiki.adom.inc/adom/hello-rust-bridge)
Copy one, change the prefix, add a verb, and you have a bridge. Then read `pup` for what a mature one looks like, because it exercises nearly every part of the contract.
## The skill library, which is the real reference
Everything above is orientation. The working reference is a set of skills that ship in the Adom Bridge package, split by the phase you are in, so an AI loads only what it needs:
| Skill | Load it when |
|---|---|
| `adom-bridge-sdk` | Orientation: the boundary, the artifacts, where every file lives |
| `adom-bridge-sdk-manifest` | Writing or fixing `bridge.json` |
| `adom-bridge-sdk-runtime` | Spawn, runtimes, loopback bind, readiness, status light, logging |
| `adom-bridge-sdk-callback` | Calling Adom Bridge verbs back, caller provenance, window branding |
| `adom-bridge-sdk-publish` | Shipping: the zip and manifest, the skills package, discovery, the checklist |
| `adom-bridge-sdk-audit` | Auditing a shipped bridge, staying current, filing issues |
Install them with:
```
adom-wiki pkg install adom/adom-bridge
```
Then ask your AI to build the bridge. That is the intended workflow: you describe the app you want reachable, and the AI does the rest against these skills.
## Naming and where your page lives
Bridge pages follow one convention: `<name>-bridge`, with no prefix. So `kicad-bridge`, `fusion-bridge`, `pup-bridge`, `rustdesk-bridge`. Your bridge gets its own wiki page, which is where your release zip, your manifest, your hero art and your discovery triggers live.
Third-party bridges are owned by their authors and live under their own accounts, following the same convention.