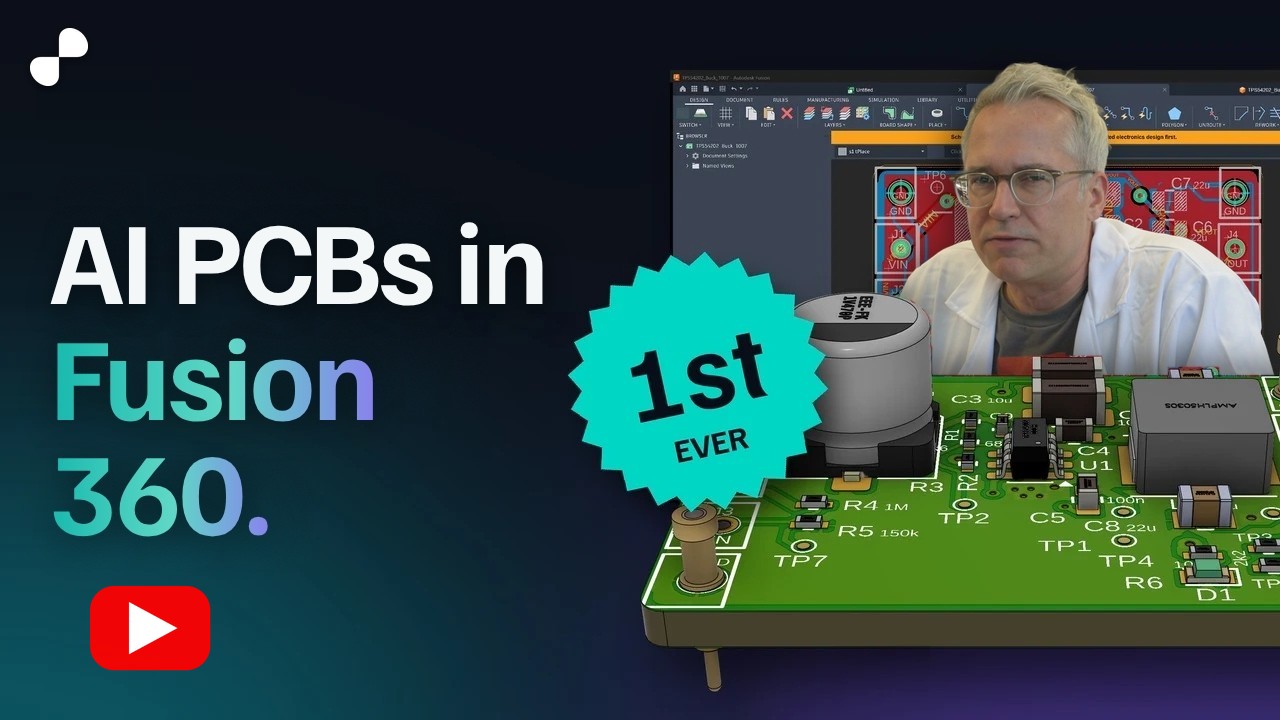
# The same buck, built by AI in Autodesk Fusion 360

::adom-3d{src="/john/buck-12v5v-molecule/render/fusion-360/buck-fusion-360.glb" poster="/john/buck-12v5v-molecule/render/fusion-360/img/3d-poster.jpg" heading="The finished board, exported from Fusion 360" caption="Cloud version 23 of TPS54202_Buck_1007. Drag to orbit, scroll to zoom."}

[Open the 3D model full screen](https://wiki.adom.inc/john/buck-12v5v-molecule/render/fusion-360/viewer.html)

This is the first video on YouTube of an AI designing a complete circuit board in Autodesk Fusion 360. AI PCB videos are starting to appear for other tools, but the AI-in-Fusion videos out there are all mechanical CAD. To make it possible we built our own MCP server on steroids, the [Fusion Bridge](https://wiki.adom.inc/adom/fusion-bridge): it lets an AI automate Fusion end to end for electronics, from signing in and building the part library to the schematic, the board, the copper and the fab files.

Here it builds the same 12 V to 5 V, 1 A TPS54202 buck as the [KiCad build on the main page](https://wiki.adom.inc/john/buck-12v5v-molecule), from one sentence, as a complete board: Claude on [Adom AI Flow](https://wiki.adom.inc/adom/adom-aiflow) inside [Adom Hydrogen](https://wiki.adom.inc/adom/hydrogen), with the Fusion Bridge driving Fusion through direct commands instead of clicks. A routed, poured, analysed board with Gerbers, a BOM and a pick-and-place file came out.

## The videos

<table>
<tr>
<td width="50%"><a href="https://www.youtube.com/watch?v=iMIVb8FOXnI"><img src="img/video-youtube.jpg" alt="1st Ever: AI Designs a Complete PCB in Fusion 360: watch on YouTube"></a><br><sub>&nbsp;&nbsp;&nbsp;&nbsp;&nbsp;&nbsp;&nbsp;&nbsp;&nbsp;&nbsp;&nbsp;&nbsp;&nbsp;&nbsp;&nbsp;&nbsp;&nbsp;&nbsp;&nbsp;&nbsp;&nbsp;&nbsp;&nbsp;&nbsp;&nbsp;&nbsp;&nbsp;&nbsp;&nbsp;&nbsp;&nbsp;&nbsp;&nbsp;&nbsp;&nbsp;&nbsp;&nbsp;&nbsp;&nbsp;&nbsp;&nbsp;&nbsp;&nbsp;&nbsp;&nbsp;&nbsp;&nbsp;&nbsp;&nbsp;&nbsp;&nbsp;&nbsp;&nbsp;&nbsp;&nbsp;&nbsp;&nbsp;&nbsp;&nbsp;&nbsp;&nbsp;Watch&nbsp;on&nbsp;YouTube&nbsp;&nbsp;&nbsp;&nbsp;&nbsp;&nbsp;&nbsp;&nbsp;&nbsp;&nbsp;&nbsp;&nbsp;&nbsp;&nbsp;&nbsp;&nbsp;&nbsp;&nbsp;&nbsp;&nbsp;&nbsp;&nbsp;&nbsp;&nbsp;&nbsp;&nbsp;&nbsp;&nbsp;&nbsp;&nbsp;&nbsp;&nbsp;&nbsp;&nbsp;&nbsp;&nbsp;&nbsp;&nbsp;&nbsp;&nbsp;&nbsp;&nbsp;&nbsp;&nbsp;&nbsp;&nbsp;&nbsp;&nbsp;&nbsp;&nbsp;&nbsp;&nbsp;&nbsp;&nbsp;&nbsp;&nbsp;&nbsp;&nbsp;&nbsp;&nbsp;&nbsp;</sub></td>
<td width="50%"><strong><a href="https://www.youtube.com/watch?v=iMIVb8FOXnI">1st Ever: AI Designs a Complete PCB in Fusion 360</a></strong> (4 min 47 s). This run: the same 12 V to 5 V buck as part 1, built from one prompt as a complete board in Autodesk Fusion 360. Claude on <a href="https://wiki.adom.inc/adom/adom-aiflow">Adom AI Flow</a> pulls the parts from the Adom wiki, and the <a href="https://wiki.adom.inc/adom/fusion-bridge">Fusion Bridge</a> signs in to Fusion, builds the library, draws the schematic and lays out the board. Along the way AI Flow sends Claude back to fix its own placement and heatsink vias, Adom Fields checks the current and heat, and the run ends with Gerbers, a BOM and a pick-and-place file. It took 2 h 42 min from prompt to finished board.</td>
</tr>
<tr>
<td width="50%"><a href="https://www.youtube.com/watch?v=vKUMzy261zs"><img src="docs/img/video-youtube.jpg" alt="AI PCB Design for Engineers: watch on YouTube"></a><br><sub>&nbsp;&nbsp;&nbsp;&nbsp;&nbsp;&nbsp;&nbsp;&nbsp;&nbsp;&nbsp;&nbsp;&nbsp;&nbsp;&nbsp;&nbsp;&nbsp;&nbsp;&nbsp;&nbsp;&nbsp;&nbsp;&nbsp;&nbsp;&nbsp;&nbsp;&nbsp;&nbsp;&nbsp;&nbsp;&nbsp;&nbsp;&nbsp;&nbsp;&nbsp;&nbsp;&nbsp;&nbsp;&nbsp;&nbsp;&nbsp;&nbsp;&nbsp;&nbsp;&nbsp;&nbsp;&nbsp;&nbsp;&nbsp;&nbsp;&nbsp;&nbsp;&nbsp;&nbsp;&nbsp;&nbsp;&nbsp;&nbsp;&nbsp;&nbsp;&nbsp;&nbsp;Watch&nbsp;on&nbsp;YouTube&nbsp;&nbsp;&nbsp;&nbsp;&nbsp;&nbsp;&nbsp;&nbsp;&nbsp;&nbsp;&nbsp;&nbsp;&nbsp;&nbsp;&nbsp;&nbsp;&nbsp;&nbsp;&nbsp;&nbsp;&nbsp;&nbsp;&nbsp;&nbsp;&nbsp;&nbsp;&nbsp;&nbsp;&nbsp;&nbsp;&nbsp;&nbsp;&nbsp;&nbsp;&nbsp;&nbsp;&nbsp;&nbsp;&nbsp;&nbsp;&nbsp;&nbsp;&nbsp;&nbsp;&nbsp;&nbsp;&nbsp;&nbsp;&nbsp;&nbsp;&nbsp;&nbsp;&nbsp;&nbsp;&nbsp;&nbsp;&nbsp;&nbsp;&nbsp;&nbsp;&nbsp;</sub></td>
<td width="50%"><strong>Part 1: <a href="https://www.youtube.com/watch?v=vKUMzy261zs">AI PCB Design for Engineers</a></strong> (about 4 min). The first build of this board, in KiCad 10, and the precursor to this Fusion 360 run. It covers the prompt in <a href="https://wiki.adom.inc/adom/hydrogen">Adom Hydrogen</a>, the circuit, three SPICE engines in agreement, the live layout, the current and heat analysis and the rework it caused. The same brief built in Altium is planned as the next part. <a href="https://wiki.adom.inc/john/buck-12v5v-molecule">The KiCad build</a>.</td>
</tr>
</table>

## Parts

Every part on this board has its own page on the Adom wiki, with its symbol, footprint and 3D model, ready to reuse in your own designs. Click a part to open its page. These are the same parts as the KiCad build, whose [BOM](../design/bom.csv) lists every distributor number; the Fusion board has six edge contacts where the KiCad one has seven.

| part | qty | refs | value | what it does | source |
|---|---|---|---|---|---|
| <a href="https://wiki.adom.inc/adom/tps54202ddcr"><img src="docs/parts/tps54202ddcr.png?v=8124369c" width="64" alt="TPS54202DDCR"></a><br>**[TPS54202DDCR](https://wiki.adom.inc/adom/tps54202ddcr)**<br>Texas Instruments | 1 | U1 | TPS54202DDCR | sync buck 4.5-28 V 2 A 500 kHz | [Mouser 595-TPS54202DDCR](https://www.mouser.com/ProductDetail/595-TPS54202DDCR) |
| <a href="https://wiki.adom.inc/john/amplh5030s-150mt"><img src="docs/parts/amplh5030s-150mt.png?v=03a239da" width="64" alt="AMPLH5030S-150MT"></a><br>**[AMPLH5030S-150MT](https://wiki.adom.inc/john/amplh5030s-150mt)**<br>Abracon | 1 | L1 | 15uH | output inductor | [Mouser 815-AMPLH5030S-150T](https://www.mouser.com/ProductDetail/815-AMPLH5030S-150T) |
| <a href="https://wiki.adom.inc/john/eee-fk1v470p"><img src="docs/parts/eee-fk1v470p.png?v=9a4b5ad4" width="64" alt="EEE-FK1V470P"></a><br>**[EEE-FK1V470P](https://wiki.adom.inc/john/eee-fk1v470p)**<br>Panasonic | 1 | C1 | 47uF 35V | input bulk (cable damping) | [Mouser 667-EEE-FK1V470P](https://www.mouser.com/ProductDetail/667-EEE-FK1V470P) |
| <a href="https://wiki.adom.inc/john/cc1206kkx7r8bb106"><img src="docs/parts/cc1206kkx7r8bb106.png?v=f4d196bf" width="64" alt="CC1206KKX7R8BB106"></a><br>**[CC1206KKX7R8BB106](https://wiki.adom.inc/john/cc1206kkx7r8bb106)**<br>Yageo | 2 | C2, C3 | 10uF 25V X7R | input ceramic | [Mouser 603-CC126KKX7R8BB106](https://www.mouser.com/ProductDetail/603-CC126KKX7R8BB106) |
| <a href="https://wiki.adom.inc/adom/0603b104j500ct"><img src="docs/parts/0603b104j500ct.png?v=073322b9" width="64" alt="0603B104J500CT"></a><br>**[0603B104J500CT](https://wiki.adom.inc/adom/0603b104j500ct)**<br>Walsin | 2 | C4, C5 | 100nF 50V X7R | VIN pin HF bypass | [Adom stock](https://wiki.adom.inc/adom/adom-basic-parts) |
| <a href="https://wiki.adom.inc/adom/cl21a226mpqnnne"><img src="docs/parts/cl21a226mpqnnne.png?v=cf34a6ad" width="64" alt="CL21A226MPQNNNE"></a><br>**[CL21A226MPQNNNE](https://wiki.adom.inc/adom/cl21a226mpqnnne)**<br>Samsung | 3 | C6, C7, C8 | 22uF 10V X5R | output ceramic | [Adom stock](https://wiki.adom.inc/adom/adom-basic-parts) |
| <a href="https://wiki.adom.inc/adom/0402n680j500ct"><img src="docs/parts/0402n680j500ct.png?v=4d668a63" width="64" alt="0402N680J500CT"></a><br>**[0402N680J500CT](https://wiki.adom.inc/adom/0402n680j500ct)**<br>Walsin | 1 | C9 | 68pF C0G | feed-forward across Rtop | [Adom stock](https://wiki.adom.inc/adom/adom-basic-parts) |
| <a href="https://wiki.adom.inc/adom/cr0402-fx-6802glf"><img src="docs/parts/cr0402-fx-6802glf.png?v=6ca13f09" width="64" alt="CR0402-FX-6802GLF"></a><br>**[CR0402-FX-6802GLF](https://wiki.adom.inc/adom/cr0402-fx-6802glf)**<br>Bourns | 1 | R1 | 68k | FB top (series part 1) | [Adom stock](https://wiki.adom.inc/adom/adom-basic-parts) |
| <a href="https://wiki.adom.inc/adom/cr0402-fx-5601glf"><img src="docs/parts/cr0402-fx-5601glf.png?v=4ead7597" width="64" alt="CR0402-FX-5601GLF"></a><br>**[CR0402-FX-5601GLF](https://wiki.adom.inc/adom/cr0402-fx-5601glf)**<br>Bourns | 1 | R2 | 5.6k | FB top (series part 2) | [Adom stock](https://wiki.adom.inc/adom/adom-basic-parts) |
| <a href="https://wiki.adom.inc/adom/cr0402-fx-1002glf"><img src="docs/parts/cr0402-fx-1002glf.png?v=47a6e33d" width="64" alt="CR0402-FX-1002GLF"></a><br>**[CR0402-FX-1002GLF](https://wiki.adom.inc/adom/cr0402-fx-1002glf)**<br>Bourns | 3 | R3, R7, R8 | 10k | FB bottom | [Adom stock](https://wiki.adom.inc/adom/adom-basic-parts) |
| <a href="https://wiki.adom.inc/adom/cr0402-fx-1004glf"><img src="docs/parts/cr0402-fx-1004glf.png?v=0822eb09" width="64" alt="CR0402-FX-1004GLF"></a><br>**[CR0402-FX-1004GLF](https://wiki.adom.inc/adom/cr0402-fx-1004glf)**<br>Bourns | 1 | R4 | 1M | EN UVLO top | [Adom stock](https://wiki.adom.inc/adom/adom-basic-parts) |
| <a href="https://wiki.adom.inc/adom/cr0402-fx-1503glf"><img src="docs/parts/cr0402-fx-1503glf.png?v=a9be28f3" width="64" alt="CR0402-FX-1503GLF"></a><br>**[CR0402-FX-1503GLF](https://wiki.adom.inc/adom/cr0402-fx-1503glf)**<br>Bourns | 1 | R5 | 150k | EN UVLO bottom | [Adom stock](https://wiki.adom.inc/adom/adom-basic-parts) |
| <a href="https://wiki.adom.inc/adom/cr0402-fx-2201glf"><img src="docs/parts/cr0402-fx-2201glf.png?v=124897f2" width="64" alt="CR0402-FX-2201GLF"></a><br>**[CR0402-FX-2201GLF](https://wiki.adom.inc/adom/cr0402-fx-2201glf)**<br>Bourns | 1 | R6 | 2.2k | LED resistor | [Adom stock](https://wiki.adom.inc/adom/adom-basic-parts) |
| <a href="https://wiki.adom.inc/adom/in-s63btg"><img src="docs/parts/in-s63btg.png?v=9c03517e" width="64" alt="IN-S63BTG"></a><br>**[IN-S63BTG](https://wiki.adom.inc/adom/in-s63btg)**<br>Inolux | 1 | D1 | green LED | 5 V power-good indicator | [Adom stock](https://wiki.adom.inc/adom/adom-basic-parts) |
| <a href="https://wiki.adom.inc/adom/machinecontactmedium"><img src="docs/parts/machinecontactmedium.png?v=98d8c6d3" width="64" alt="MachineContactMedium"></a><br>**[MachineContactMedium](https://wiki.adom.inc/adom/machinecontactmedium)**<br>Adom | 6 | J1 to J6 | MachineContactMedium | molecule edge contact | [Adom stock](https://wiki.adom.inc/adom/adom-basic-parts) |
| <a href="https://wiki.adom.inc/adom/machinepinmediumshort"><img src="docs/parts/machinepinmediumshort.png?v=33dcf6f3" width="64" alt="MachinePinMediumShort"></a><br>**[MachinePinMediumShort](https://wiki.adom.inc/adom/machinepinmediumshort)**<br>Adom | 4 | MP1 to MP4 | MachinePinMediumShort | corner machine pin (GND) | [Adom stock](https://wiki.adom.inc/adom/adom-basic-parts) |

## Where the current and heat go

<table>
<tr>
<td width="50%"><a href="https://www.youtube.com/watch?v=GtEOlbPonTs"><img src="docs/img/fields-video-youtube.jpg" alt="Where the Current and Heat Go: watch on YouTube"></a><br><sub>&nbsp;&nbsp;&nbsp;&nbsp;&nbsp;&nbsp;&nbsp;&nbsp;&nbsp;&nbsp;&nbsp;&nbsp;&nbsp;&nbsp;&nbsp;&nbsp;&nbsp;&nbsp;&nbsp;&nbsp;&nbsp;&nbsp;&nbsp;&nbsp;&nbsp;&nbsp;&nbsp;&nbsp;&nbsp;&nbsp;&nbsp;&nbsp;&nbsp;&nbsp;&nbsp;&nbsp;&nbsp;&nbsp;&nbsp;&nbsp;&nbsp;&nbsp;&nbsp;&nbsp;&nbsp;&nbsp;&nbsp;&nbsp;&nbsp;&nbsp;&nbsp;&nbsp;&nbsp;&nbsp;&nbsp;&nbsp;&nbsp;&nbsp;&nbsp;&nbsp;&nbsp;Watch&nbsp;on&nbsp;YouTube&nbsp;&nbsp;&nbsp;&nbsp;&nbsp;&nbsp;&nbsp;&nbsp;&nbsp;&nbsp;&nbsp;&nbsp;&nbsp;&nbsp;&nbsp;&nbsp;&nbsp;&nbsp;&nbsp;&nbsp;&nbsp;&nbsp;&nbsp;&nbsp;&nbsp;&nbsp;&nbsp;&nbsp;&nbsp;&nbsp;&nbsp;&nbsp;&nbsp;&nbsp;&nbsp;&nbsp;&nbsp;&nbsp;&nbsp;&nbsp;&nbsp;&nbsp;&nbsp;&nbsp;&nbsp;&nbsp;&nbsp;&nbsp;&nbsp;&nbsp;&nbsp;&nbsp;&nbsp;&nbsp;&nbsp;&nbsp;&nbsp;&nbsp;&nbsp;&nbsp;&nbsp;</sub></td>
<td width="50%"><strong><a href="https://www.youtube.com/watch?v=GtEOlbPonTs">Where the Current and Heat Go</a></strong> (8 min 44 s). The KiCad build of this board solved in <a href="https://wiki.adom.inc/adom/adom-fields">Adom Fields</a>, in eleven narrated views: current density, heat flow, temperature, the current and voltage flowing, energy, how fast a switch-on travels, the energy cycle, charge, the magnetic field and EMC. Fields is the same solver that checked the Fusion board's copper in this run. <a href="https://wiki.adom.inc/john/buck-12v5v-molecule/files/docs/thermal-current.md">The numbers</a>.</td>
</tr>
</table>

## At a glance

| | |
|---|---|
| The prompt | "Use adom-aiflow to design a 12 V to 5 V, 1 A buck converter using the TPS54202, and build it as a complete board in Autodesk Fusion." |
| The AI | Claude Code on Claude Opus 5.5, in Hydrogen |
| Prompt to finished board | 2 h 42 min, 21 steps, 4 loop-backs, none skipped |
| Design check | 0 errors, 0 unconnected |
| Current | peak 53 A/mm² across the copper, 0 issues |
| Heat | U1 rises 49 °C in still air (28.5 °C with airflow) |
| Board | 28 x 20 mm Adom molecule, 2 layers |
| Out of the run | Gerbers, BOM and pick-and-place (CPL) |

## Files: build it, or open it in your own Fusion 360

Everything we used to make this board, exported from the final cloud version (TPS54202_Buck_1007, version 23) on November 18, 2026. Download what you need, or take it all in one zip.

**[Download everything (7 MB zip)](files/TPS54202_Buck_1007_all-files.zip)**

### To have it made

These four files are what a board house needs. They were exported fresh from version 23 and match the earlier export byte for byte, so the board has not changed since the run.

| file | what it is |
|---|---|
| [TPS54202_Buck_1007_gerbers.zip](files/fab/TPS54202_Buck_1007_gerbers.zip) | Gerbers and drill: top and bottom copper, solder mask, paste, silkscreen, outline and an Excellon drill file. 2 layers, 28 x 20 mm. |
| [TPS54202_Buck_1007-cpl.csv](files/fab/TPS54202_Buck_1007-cpl.csv) | Pick and place: 20 parts with X, Y, rotation and side. |
| [bom.csv](files/fab/bom.csv) | Full bill of materials: value, package, MPN, manufacturer, and the Mouser, DigiKey and LCSC numbers. |
| [bom-jlcpcb.csv](files/fab/bom-jlcpcb.csv) | The same parts in JLCPCB's assembly BOM format. |

Notes for whoever builds it:

- **Machine contacts and pins** (J1 to J6, MP1 to MP4) are fitted after assembly. They are marked DNP in bom.csv and left out of the pick and place and the JLCPCB BOM.
- **Test points** (TP1 to TP4, TP6 to TP8) are bare copper pads, not parts. TP5 was removed after the run.
- **C1 and L1 have no LCSC number.** Source them from Mouser or DigiKey (numbers in bom.csv).
- **Order the TPS54202 early.** It was out of stock at Mouser and DigiKey when this was built, with a 140-day lead time.

### To open it in Fusion 360

| file | what it is |
|---|---|
| [TPS54202_Buck_1007.sch](files/TPS54202_Buck_1007.sch) | The schematic, as EAGLE XML. |
| [TPS54202_Buck_1007.brd](files/TPS54202_Buck_1007.brd) | The routed, poured board, as EAGLE XML. |
| [Buck12V5V_1007.lbr](files/Buck12V5V_1007.lbr) | The project library: all 17 parts with symbols, footprints and part numbers (MPN, manufacturer, Mouser, DigiKey, LCSC). The schematic and board already carry a copy, so you only need this to reuse the parts in your own designs. It has no 3D links, so it opens cleanly in any account. To get it with 3D, see [Rebuild the library and the board](#rebuild-the-library-and-the-board-in-your-own-fusion-with-3d) below. |
| [TPS54202_Buck_1007_3D.f3d](files/TPS54202_Buck_1007_3D.f3d) | The assembled board in 3D, as a Fusion archive, with every part model inside it. |
| [TPS54202_Buck_1007.step](files/TPS54202_Buck_1007.step) | The same 3D board as STEP, for any mechanical CAD tool. |
| [TPS54202_Buck_1007.fsch](files/TPS54202_Buck_1007.fsch) and [.fbrd](files/TPS54202_Buck_1007.fbrd) | The schematic and board in Fusion's own file format, for tools that read it. |

**Open the board:**

1. Download the .sch and .brd and keep them in the same folder, with the same name.
2. In Fusion, choose **File > Open**, then **Open from my computer**, and pick **TPS54202_Buck_1007.sch**.
3. Fusion creates a new electronics design with the schematic, and brings in the matching .brd as the board.
4. Save it to your own project.

We tested these two files through Fusion's own EAGLE importer into a new design: all 37 parts land on the board, the copper is fully routed (0 airwires), and Fusion reports the schematic and board in sync.

**Open the 3D board:** choose **File > Open > Open from my computer** and pick **TPS54202_Buck_1007_3D.f3d**. The part models are inside the archive, so it renders in any Fusion account.

### Rebuild the library and the board in your own Fusion, with 3D

Each part's 3D model in the .sch, .brd and library above is linked to the Adom team's Autodesk cloud. In your account the board opens and routes fine, but the parts come in without 3D bodies. These two files fix that: they rebuild the library in your own Fusion with a 3D model for every part, then point the board at your copies.

| file | what it is |
|---|---|
| [Buck12V5V_1007_bundle.zip](files/Buck12V5V_1007_bundle.zip) | The library plus one STEP model per part (17), each named after its package so the importer pairs them by name. |
| [rebind_board_3d.py](files/rebind_board_3d.py) | Rewrites the 3D links in the .sch and .brd to the ones in your rebuilt library, matched by package name. Python 3, nothing to install. |

You need [Adom Hydrogen](https://wiki.adom.inc/adom/hydrogen-bootstrap) with Adom Bridge on the PC that runs Fusion, and the [Fusion 360 Bridge](https://wiki.adom.inc/adom/fusion-bridge) installed there. Then tell your AI:

> Rebuild the Buck12V5V_1007 library and the TPS54202_Buck_1007 board in my Fusion with 3D, using the recipe in the fusion-360 README on john/buck-12v5v-molecule.

![The rebuilt board in Fusion's 3D view: every part rendered from the rebuilt library](img/21-rebuilt-3d.jpg)

**The recipe, for your AI.** Bridge verbs run against the PC that has Fusion (`adom-bridge --target <that PC>`). The Python step runs in your Adom workspace, because most Windows PCs have no Python.

1. **Start clean.** `fusion_readiness` must answer `ready:true`. Close every open document first: the import opens each part's library on its own, and an electronics document left in front can stall it.
2. **Stage the files.** Download `Buck12V5V_1007_bundle.zip`, `rebind_board_3d.py`, `TPS54202_Buck_1007.sch` and `TPS54202_Buck_1007.brd` from this folder into your workspace. `send_files` the zip to the PC (for example `{"filePaths":[...],"dest":"%TEMP%/buck_rebuild","destIsFolder":true}`).
3. **Rebuild the library.** `fusion_install_library_bundle {"zipPath":"<folder>/Buck12V5V_1007_bundle.zip","libraryName":"Buck12V5V_1007"}`. It answers at once with a `runId`, `partsToBind: 17` and an empty `unbound[]`. For each part it imports the STEP onto that part's footprint, saves the result to your Autodesk cloud, and writes the 3D link into the library.
4. **Wait for it, and close error dialogs.** Poll `fusion_prove_result {"runId":"<runId>"}` about every 30 seconds; the fields are under `result`, and it is done when `result.success` is set. On each poll, also run `fusion_check_dialogs`. For every part, Fusion shows an "Error ... `<part>.lbr` has errors and cannot be opened" dialog, and the run waits until it is closed. Close it with `desktop_ui_click {"hwnd":<hwnd>,"name":"OK"}` (a keystroke does not reach it). The part still binds. Our run took 27 minutes.
5. **Check the library.** `result.bind.parts[]` lists each part with `success`. The library is at `result.libraryPath` (`Documents/AdomLibraries/Buck12V5V_1007/Buck12V5V_1007.lbr`) and in Fusion's Library Manager under "Adom Libraries". `pull_file` it to your workspace and count `<package3d name=`: it must be 17. If a part failed, run step 3 again: it keeps every 3D link already made and fills in the rest.
6. **Point the board at your 3D.** In your workspace: `python3 rebind_board_3d.py --lbr Buck12V5V_1007.lbr --sch TPS54202_Buck_1007.sch --brd TPS54202_Buck_1007.brd --out rebound`. Expect `OK:` with 17 packages for each file. It stops with `ERROR:` and names any part that has no 3D link yet. `send_files` the two files in `rebound/` to one folder on the PC.
7. **Import the board.** `fusion_new_electronics_from_eagle {"schPath":"<folder>/TPS54202_Buck_1007.sch","brdPath":"<folder>/TPS54202_Buck_1007.brd"}`, then poll `fusion_eagle_import_status {"runId":...}` until `success`. By hand instead: **File > Open > Open from my computer** and pick the rebound .sch.
8. **Check it.** `fusion_routing_state {"expectDocument":"Untitled"}` should show 37 components, every one with `has3d: true`, and `airwireCount: 0`. Look at the 3D tab, then save the design to your own project.

We ran this recipe end to end on November 18, 2026, on a Windows PC with a clean Fusion. All 17 parts got 3D links in that account's cloud. The rebind rewrote 125 links and left none of the old ones. The import placed 37 of 37 parts with 0 airwires and 3D on all 37, shown above. One part (MACHINECONTACTMEDIUM) failed the first pass and bound on a second try. The one visible difference from the video: the inductor's top is plain, because the STEP here is the manufacturer's unmarked model, while the run's model had the part number printed on it. The test ran in an Adom team account, which can also see our original 3D, so it proves the board renders from the rebuilt links, not yet that it renders in an account outside the team.

## The tools

| tool | what it did here |
|---|---|
| [Adom Hydrogen](https://wiki.adom.inc/adom/hydrogen) | The workbench: VS Code and Claude on the left, web views (timeline, wiki, SPICE, Fields) on the right. |
| [Adom AI Flow](https://wiki.adom.inc/adom/adom-aiflow) | The run itself: plans the 21 steps, checks each one, and sends Claude back when a step fails its check. |
| [Fusion Bridge](https://wiki.adom.inc/adom/fusion-bridge) | Drives Fusion 360 on a Windows PC from the cloud: sign-in, library, schematic, board, exports. |
| [Adom wiki component pages](https://wiki.adom.inc/adom/tps54202ddcr) | Where every part comes from: symbol, footprint, a checked 3D model and distributor numbers. |
| [Adom SPICE](https://wiki.adom.inc/adom/adom-spice-skillpack) | The dashboard: ngspice in the container, with LTspice and PSpice for TI one click away, all on one set of axes. |
| [Adom Fields](https://wiki.adom.inc/adom/adom-fields) | Current density and heat on the real copper. |

## The run, step by step

### 1. One prompt

The video opens on the whole job in one sentence, typed into Claude Code inside [Adom Hydrogen](https://wiki.adom.inc/adom/hydrogen). Naming [adom-aiflow](https://wiki.adom.inc/adom/adom-aiflow) is what turns the request into a measured run with a clock, a plan and checks, instead of an open-ended chat. Hydrogen puts VS Code and Claude on the left and live web views on the right, in one window, so everything the run produces shows up beside the conversation that produced it. The AI works in a cloud container, yet it builds the board in Fusion on a real Windows PC through [Adom Bridge](https://wiki.adom.inc/adom/adom-bridge).

![The prompt typed into Claude Code in Hydrogen](img/01-prompt.png)

**Try it yourself.** Copy the prompt and paste it into Claude Code in [Adom Hydrogen](https://wiki.adom.inc/adom/hydrogen):

<div class="install-cmd"><code>Use adom-aiflow to design a 12 V to 5 V, 1 A buck converter using the TPS54202, and build it as a complete board in Autodesk Fusion.</code><a class="copy-btn" title="Copy the prompt" aria-label="Copy the prompt">Copy</a></div>

### 2. The AI Flow timeline

AI Flow lays the job out as 21 steps, from intake to the finish line, and shows them as a live timeline in one of Hydrogen's web views. Every step has to pass its own check before the next one starts, and the clock runs from the prompt to the last export. Each arc on the left is a loop-back: a later step found a problem and sent Claude back to an earlier one, and this run had four. Because the timeline is a page in the same window, you watch the plan, the current step and every return as they happen, with no switching between apps. ([AI Flow](https://wiki.adom.inc/adom/adom-aiflow))

![The AI Flow timeline with its 21 steps and the loop-back arcs](img/02-timeline.jpg)

### 3. Parts from the Adom wiki

Every part on the board comes from its own component page on the Adom wiki, like the [TPS54202DDCR](https://wiki.adom.inc/adom/tps54202ddcr) here. Each page carries a symbol, a footprint, a 3D model checked Z-up, and Mouser, DigiKey and LCSC numbers, so the AI starts from parts that were already verified instead of guessing at CAD. Hydrogen opens these pages in a web view next to the chat, so the part Claude is reasoning about is on screen while it does. Parts that are not on the wiki yet are fetched and built by [Chip Fetcher](https://wiki.adom.inc/adom/adom-chip-fetcher).

![The TPS54202DDCR wiki page with its 3D model loaded](img/03-wiki-part.jpg)

The green power LED, [IN-S63BTG](https://wiki.adom.inc/adom/in-s63btg), shows a wiki feature you won't find on other part sites: a states widget, with one 3D model per state, off and lit. A viewer can show the board with the LED on, and a probing simulation can check that the LED should be lit at that test step. The widget is one of the reusable [component widgets](https://wiki.adom.inc/adom/component-widgets) any part page can carry. Flipping it from Off to On in the video is a live view of the model, not a picture.

![The IN-S63BTG LED page, its states widget switched to lit](img/04-led-states.jpg)

### 4. The bridge signs in to Fusion

The PC for this step was not signed in to Fusion yet, so the [Fusion Bridge](https://wiki.adom.inc/adom/fusion-bridge) handled the sign-in itself: it pressed Fusion's Sign in button and drove the Autodesk page in the browser. It never types a password or a 2FA code; those stay with the person. This is the part most automation stops at, because a signed-out app is a dead end for an AI. Hydrogen and Adom Bridge reach a whole desktop, not just one program, so the AI can get past the sign-in and keep going.

![The Autodesk sign-in page, driven by the Fusion Bridge](img/05-signin.jpg)

Fusion then said the license seat was still in use on another PC. The bridge chose to suspend Fusion there and continue here, the decision a person would make, and carried on. Hydrogen drives several Windows PCs as one mesh through [Adom Bridge](https://wiki.adom.inc/adom/adom-bridge), so moving the seat between machines is a normal part of a run, not an interruption.

![Fusion's Active Sessions Exceeded dialog, with the bridge choosing to suspend the other seat](img/06-seat.jpg)

### 5. One project library

AI Flow builds one Fusion library for the project, with a symbol, a footprint and a bound 3D model for every part. Here is the TPS54202 symbol, drawn with its chip outline so the schematic reads like the real package. The Fusion Bridge creates the library through Fusion's own API and commands, with no library dialogs to click through. A Fusion parts library is normally hours of careful hand work; here it is one step of the run. ([Fusion Bridge](https://wiki.adom.inc/adom/fusion-bridge))

![The TPS54202 symbol in the Fusion library](img/07-library-symbol.jpg)

The footprint comes from the same wiki page as the symbol, so pads, pin numbers and the 3D model agree by construction. Every part gets the same treatment, down to the 0.5 mm [probe test pad](https://wiki.adom.inc/adom/testpoint-pad-0-5mm) that the probing workcell lands on. Because the library is built from verified wiki data, the board that comes out of Fusion matches the parts you would order.

![The TPS54202 footprint in the Fusion library](img/08-library-footprint.jpg)

### 6. The schematic

Claude draws the schematic live in Fusion, in labelled groups. Every pin is checked against the netlist the circuit step produced, so a wrong connection fails the step instead of reaching the board. The Fusion Bridge places and wires parts through Fusion's own electronics commands, so the drawing is real Fusion data you can open and edit, not an imported picture. Hydrogen and the bridge let the AI work Fusion's electronics editor the way a person would, but by command, a whole schematic in minutes.

![The schematic drawn in Fusion, in labelled groups](img/10-schematic.jpg)

### 7. SPICE

Before any copper, the circuit is simulated in ngspice, running right in the container: the soft start from 12 V, a load step from 0.5 A to 1 A, and the inductor current through both. The dashboard can also run the same circuit in LTspice or in PSpice for TI on a Windows PC, one click each, to cross-check the result. Hydrogen keeps the plots in a web view next to the design, so the numbers that justify each part value sit on the same screen as the circuit. ([Adom SPICE](https://wiki.adom.inc/adom/adom-spice-skillpack), installed with the SPICE skill pack)

![Adom SPICE: soft start, the load step and the inductor current](img/11-spice.jpg)

### 8. Placement, and the first loop-back

Claude places the parts, then AI Flow checks the result against the layout rules before routing starts. Here the check found the switch-node trace detouring 18.9 mm because of where C5 sat, so the timeline drew an arc and sent Claude back to placement. The glowing ring marks C5 in its first spot. This is the core of AI Flow: the AI is graded step by step, and a failed check sends it back instead of letting a bad board through.

![C5 in its first spot, ringed](img/12-placement-loop.jpg)

C5 moved next to the pins it serves, and the switch-node loop got short. A second loop-back came from routing: the VOUT feed passed 0.15 mm from R6's LED pad, so Claude turned R6 to face the feed. Each return is recorded on the timeline with its reason, so you can audit every decision the AI made, not just the final board.

![C5 in its new spot, beside the switch pin](img/13-placement-fixed.jpg)

### 9. Routing, heatsink vias and pours

The board is routed to 100 percent, then the heatsink vias, the copper pours and the rounded corners each land as their own checked pass. A review of the vias found U1 had only 1 of its 6 planned heatsink vias, and AI Flow sent Claude back to routing: clear the copper, re-route around U1, place the full array and pour again. The six vias now tie U1's ground pin to the bottom ground plane, all within 2.75 mm. Every copper change happens in Fusion through the bridge's commands, so the result is a normal Fusion board design. ([AI Flow](https://wiki.adom.inc/adom/adom-aiflow))

![The routed board with its pours](img/14-routed.jpg)

The video then shows each pour net in turn, highlighted on its own. GND fills most of the board and gives the regulator's heat somewhere to go. Walking the nets one at a time is how an engineer checks a pour, and here the AI does it as a step of the run.

![The GND pour highlighted](img/16-pour-gnd.jpg)

The switch node gets a small, solid SW patch, kept short on purpose because it is the noisiest net on a buck. A large SW pour would radiate; a tight one keeps the hot loop small. That judgement comes from AI Flow's power-layout rules, which the run follows and checks.

![The SW pour highlighted](img/17-pour-sw.jpg)

### 10. Current and heat

[Adom Fields](https://wiki.adom.inc/adom/adom-fields) solves the real copper of the finished board for current density and temperature, and shows it in 3D in a Hydrogen web view. The peak current density is 53 A/mm², and the heatsink vias carry about a third of U1's 0.25 W into the ground plane. This is a field solve on the real layout, not a rule of thumb. The analysis is a step of the run, so a result over budget sends Claude back to fix the copper instead of just being reported.

![Adom Fields: heat on the board in Hydrogen](img/15-fields.jpg)

### 11. Silkscreen

The silkscreen is laid down one item at a time: framed tags on every edge contact, matched frames on the corner pins, and each value in small text beside its reference. Text heights follow the fab's minimums, so every label prints. The rules that came out of this run, such as frame sizes, equal widths and minimum text heights per fab, are now part of [AI Flow](https://wiki.adom.inc/adom/adom-aiflow)'s silkscreen skill for every future board. Good silkscreen is what makes a board easy to assemble, probe and debug.

![The finished silkscreen in Fusion](img/18-silkscreen.jpg)

### 12. The board in 3D

Fusion's 3D view shows every part sitting flat on its pads, which is the check that the library's 3D models were bound correctly. Each model came from its wiki page, already checked for orientation. The same board is in the 3D viewer at the top of this page, exported from Fusion and running in the wiki's own viewer.

![The finished board in Fusion's 3D view](img/19-3d-board.jpg)

### 13. The finish line

The timeline reaches 21 of 21 steps: the finish line is Gerbers, a BOM and a pick-and-place file exported from Fusion. AI Flow only calls the run finished when every step has passed its check, so the board is routed, design-rule clean, poured, analysed and exported. The clock stops at 2 h 42 min from the prompt. What you get is a real Fusion project plus the files a fab needs.

![The timeline at 21 of 21: Gerbers, BOM and CPL exported](img/20-finish.jpg)

## What it cost

One run on Claude Opus 5.5, prompt to finished board, 2 h 42 min. Measured from the run's own session log and Claude's plan usage meter:

| plan | cost of this run |
|---|---|
| API (pay per token) | about $24 |
| Max 20x ($200/month) | about 4 % of a week, about $1.85 |
| Max 5x ($100/month) | about 16 % of a week, about $3.70 |
| Pro ($20/month) | about 80 % of a week, about $3.70, with waits for the limit to reset |

The API figure is 203 k output tokens, 83 M cached input tokens read and 453 k written, at Opus 5.5 list prices.

## After the run

- **Silkscreen:** the pass shown in step 11 was finished after the run, one tag at a time.
- **Test points:** TP5 came off the board; its ground probe moved to J5 pin 1.
- **Final check:** 0 errors and 0 airwires, saved as the final cloud version, and the fab files were exported again. They are in [Files](#files-build-it-or-open-it-in-your-own-fusion-360) above.
- **Hottest spot:** 57 °C rise in still air against a 55 °C budget. A 28 x 20 mm board shedding 0.37 W into still air is limited by its size, not its layout.
- **Sourcing:** the TPS54202 was out of stock at Mouser and DigiKey when this was built (140-day lead), so order it early.

## How the video was made

- **Capture:** the whole run was recorded on the Windows desktop at 2560 x 1440 with Adom Bridge's built-in recorder, about 2 h 50 min of footage.
- **More than one PC:** Hydrogen drives several Windows PCs as one mesh. The run happened on one. The opening prompt, the sign-in, the library and the wiki pages were re-shot afterwards, some on other PCs, so the main take stayed untouched.
- **The cut:** a script cuts about 50 shots from the footage, sizes each one to its narration line, and renders every zoom with smooth sub-pixel motion. The rings and arrows that point at C5 and R6 are drawn on top in brand teal.
- **The cost scene:** a slow walk around the finished board, rendered natively in Fusion, behind the numbers above.
- **The thumbnail:** the board is a render from Fusion, placed over a screenshot of the same board in Fusion's 2D editor.

